Earlier this year, Google quietly released some helpful new search features for Blogger. The new options improve your blog's appearance in search results and boost its usability for your readers. They were so quiet about it, though, that many bloggers still have no idea these options are available. It's almost like they're a secret!
You know I can't stand to let you miss out on good Blogger stuff, so let me show you what they can do!
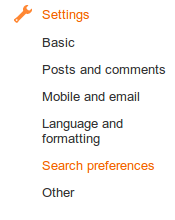
To get started, go to Settings > Search Preferences, and click the "edit" link under Meta Tags: Description. Set the "Enable search description?" radio button to "yes", and press save. You'll go back to set your blog's description in a few steps, but let's get started with the post search description.
Search Description
You can find the search description option in the right column of your post editor. It's under "Post settings".
Your search description is your chance to give readers a little preview of your post before they click on your link from a search engine or social network. Here's an example of a search engine result for my Pinterest gadget for Blogger post:
That summary below the link is the custom search description I wrote for the post. It gives potential visitors a good preview of what they'll read if they click on the link. It's short; I kept it under 160 characters because that's the limit of what Google will show on a search engine result. Other search engines will show slightly more, but I think it's best to stay under the lowest limit.
Notice that I wrote this description as a normal sentence, not a series of keywords. That's because the search description is meant for humans. Write your search descriptions in the same voice you use on your blog. You're talking to people here, not robots!
Search Descriptions Work on Facebook, Too
As if the search engine results weren't cool enough, there's another nice benefit to filling in a search description: it gives you control over how your post is described when it's shared on Facebook. Take a look:
Great, right? That definitely beats the random excerpts Facebook used to grab from Blogger posts!
Search Preferences
Now let's move on to the new search preferences, which you can find under Settings > Search Preferences.
These new search preferences give you more control over how your blog shows up in search engine results, and let you control what happens when a vistor follows a dead link to your blog. Here's what they do:
Meta Tags: Description
The Description describes your blog to search engine visitors, in the same way the search descriptions describe your individual blog posts. Here's what my custom description looks like in a Google search:
Again, keep it brief and human-friendly!
Custom Page Not Found
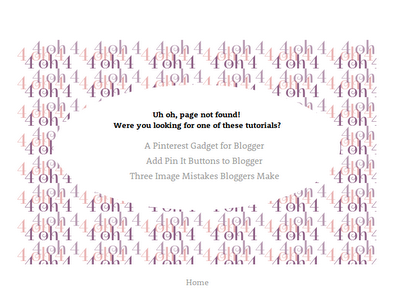
Once in awhile, your readers will follow a dead link to your site and land on your "page not found" error page (also known as a 404 page). The new, "custom page not found" option allows you to customize what your readers see when they land on this page. Now, instead of a discouraging error message, you can give your readers a useful page that can help them find their way to the right part of your blog.
I've added a set of links to my most popular posts on my "page not found" page. And, since the page accepts HTML, I was able to format my links as a list and style the page with CSS. You can see a live example of my custom "not found" page at: http://www.codeitpretty.com/fourohfour.html, or read about how I made it in this post.
Custom Redirects
Not everyone is going to need custom redirects for their blog, but they're incredibly useful in some situations. Here are a couple of good reasons to use custom redirects on your blog:
Correcting misspelled inbound linksRaise your hand if this has happened to you: you tweet a link to your blog, the tweet gets retweeted by your wonderful followers — and then you realize you left off the .html at the end of the URL. In the past, that meant anyone clicking that link would go to your "page not found" page. But, now you can take your misspelled link into your custom redirect editor and point them to the correct page in your blog. Select the "permanent" checkbox to lock the change in.
Redirecting traffic from obsolete pages and postsIf you've removed a popular post or page from your blog, you should redirect traffic from that old page or post to another part of your blog. That way, visitors following older links to the removed parts of your site will get content, not an error page. To keep your readers happy, try to make sure you're redirecting them to the most relevant existing page.
For example, if you remove a cupcake recipe that calls for an ingredient that's no longer available, you should redirect the link to a revised version of the cupcake recipe or a general cupcake recipe section; the more similar the content at the new link is to the content at the old link, the better. That way your visitors are less likely to be confused or annoyed by what they find at the redirected link. Again, select the "permanent" checkbox to lock the change in.
This also works if you've moved to Blogger from a different platform, but kept the same domain name. You may have old links out there to static pages on your old site that don't coorespond to the URL structure of your new Blogger static pages. You can redirect traffic from those old links to your new Blogger pages using the custom redirects.
Temporarily redirecting visitors to a more timely postHere's another example: let's say you host an annual giveaway for one of your sponsors, and you've been doing it for three years. You still get visits to the old giveaway posts, and many other bloggers have linked to your older giveaways. You can temporarily redirect all of the traffic coming to those older links to your current giveaway, so that your new visitors have a chance to enter the giveaway that's actually taking place. All you have to do to set up a temporary redirect is leave the "permanent" checkbox unchecked, then save the redirect. Once the giveaway is over, you can delete the redirect and traffic will flow to the old pages like it used to.
Crawlers and Indexing
Did you notice the "Crawlers and Indexing" section of the Search Preferences area? Then I'm sure you also noticed the big "Warning!" banner above it. I'll keep this part super-brief: just leave that alone. I know, I know, I'm being vague. But, if you need to use one of those features, you probably don't need me to tell you how to use it. If you're curious, you can check out http://www.robotstxt.org/robotstxt.html for everything there is know about robots.txt.


